
The first steps are great advice. Here is her first step
Step 1. An online shop is only as effective as its photographs. Good product photography will always be your best marketing tool. I don't have a fancy camera, I use an older model Kodak Easyshare, so I try to make my photos shine with Photoshop. I'm using an older version of PS, CS3. This information will be most helpful to you if you have at least a little experience using Photoshop.
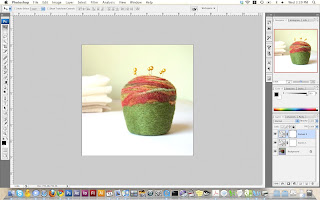
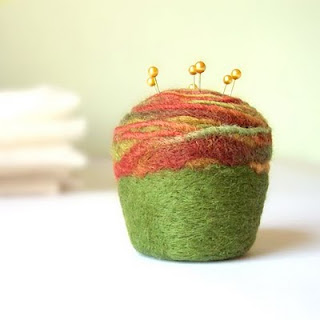
I have a shelf near a window where I put down some white paper and capture the natural light on my subject, which today is a little felted wool pincushion. I set up an object to be in the background and give the photo some depth, in this case a stack of folded linen fabric.

I take a bunch of shots from slightly different angles keeping in mind my final composition will be square. I try not to take 30 shots because I don't want to have to sort through 30 pictures later, I will probably take 5-10. Here's the one I'll edit today:

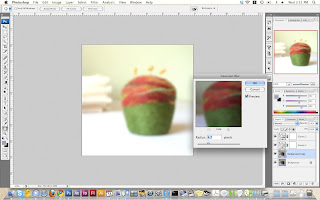
I open the picture in Photoshop and use the crop tool to make my favorite size for Etsy listings, 8 inches x 8 inches at 125 DPI. This makes it so when my customer clicks on the picture it will become larger and give them a chance to take a good, close look while the picture remains within Etsy's size parameters.

This is the point where I veer off in another direction.
Step 2. Adjustment layers are great because you can make adjustments, to brightness/contrast, levels, curves, etc... all without destroying the original image. These adjustment layers can be layered one on top of the other. Each adjustment layer affects all the layers below it as if everything below it was one image.... all while retaining all your layers.
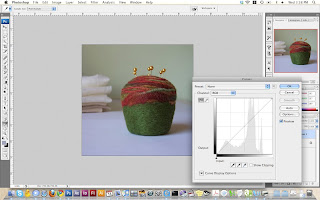
The first adjustment layer I use is Curves. I was once told that curves is better than levels and brightness/contrast combined. You can find curves at the bottom of your layers pane. it looks like a moon cookie - half black half white.
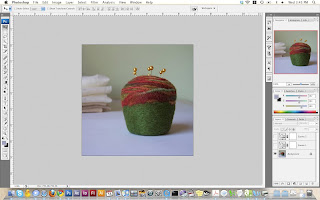
 You'll see when the Curves window pops up that there are 3 eyedroppers. One dark one middle and one white. Pick the white eyedropper. And then click on an area of the photo that should be pure white.
 This is how you can tell photoshop what area should be white. Photoshop will automatically do the work. This works on 99% of the photos you will be adjusting. The only time this does not work is when you have a largely white photo with lots of shades of white or it's monochromatic.
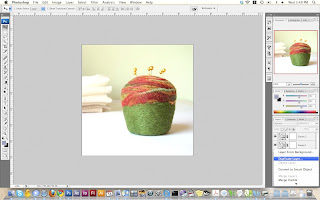
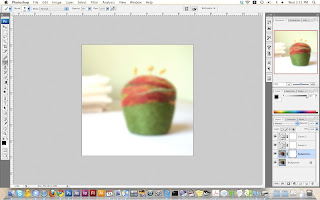
 Press Ok and you'll notice it creates it's own layer above your photo.

 Press Ok and you'll notice it creates it's own layer above your photo.
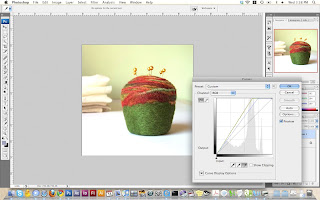
 Step 3. (you can skip to Step 4 if you're happy with your image after this) Next, because I'm trying to match her photo, I am going to add another adjustment curves layer (you can add as many as you want!) Once again, the curves window will pop up.
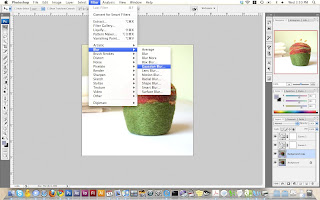
 At the top of the window is a drop down menu. This gives you preset options. I use "lighten" a lot. Don't be afraid to try some of the other presets to see if you like the results... remember, it's not changing your original photo!
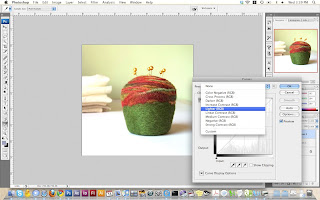 Once you click lighten, you'll see a difference. You can change the graph manually if it's not perfect. This is a graph of the dark to light interpretation of your image. By default it's a straight line.
Pull the middle of the graph up... too light.
 Pull the graph down, too dark.
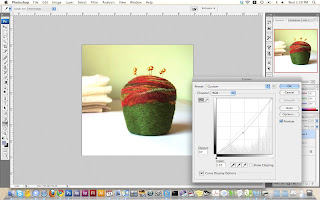 The preset was just fine. So I used the preset of Lighten and clicked OK. We now have 2 adjustment layers.
 Step 4. To create the depth of field in her image I use a similar process. Duplicate the original layer.
 Apply a Gaussian blur to this new layer which is on top of your old layer. Notice this is all underneath your adjustment layers, so it still looks all purdy!
 Step 5. This is where Liz uses the eraser tool. Personally, I don't like the eraser tool is because it's "destructive" meaning it modified the actual image and may be hard to get it back if you don't have enough levels of undo.
 Pull the graph down, too dark.
 The preset was just fine. So I used the preset of Lighten and clicked OK. We now have 2 adjustment layers.
You can hide the two layers and you will see your original layer. (to hide a layer, click on the eyeball on that layer).
 Step 4. To create the depth of field in her image I use a similar process. Duplicate the original layer.
 Apply a Gaussian blur to this new layer which is on top of your old layer. Notice this is all underneath your adjustment layers, so it still looks all purdy!
 Step 5. This is where Liz uses the eraser tool. Personally, I don't like the eraser tool is because it's "destructive" meaning it modified the actual image and may be hard to get it back if you don't have enough levels of undo.
This is where MASKS come in. To work with masks you just have to know this:
WHITE means fully opaque.
BLACK means fully transparent
SHADES OF GREY are in between the two.
Apply a mask to your fuzzy layer. Make sure you're clicked on your fuzzy layer and hit the mask button. The mask button is in your layers toolbar, right next to the adjustment layer button. It looks like a circle inside a rectangle.
 You'll notice it adds a fully white box onto the layer. This white box is your mask for that layer. that means the entire image is fully transparent. Fully white=fully transparent.
 Next click on the paintbrush tool. NOT the eraser. The paintbrush tool. Make sure your paintbrush is going to paint BLACK. I like to use a paintbrush with soft edges (0% hardness) so it's not so obvious where the edges of my brush are.
 Since your layer under the fuzzy layer is "in focus" you want the closer thing (the pin cushion) to show through. This means you want to remove the fuzzy picture wherever the pincushion is. PAINT BLACKNESS where the pin cushion is.
 Notice below, you can see in my layers pane, there is a big black splotch where the pin cushion is. This means I am technically erasing away the fuzzy photo the same way the eraser does. EXCEPT!! If you paint WHITE back in.... VOILA, your fuzzy picture returns.
Masks allow you to erase without actually deleting information.
Here I zoomed in so I can get up close to the edges without removing too much.
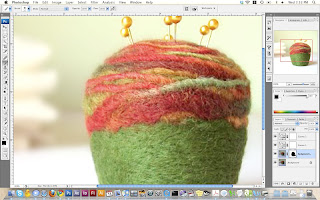 Basically, masks are things that tell photoshop what you want to be transparent versus opaque. Use shades of grey and you'll have semi transparent areas (nice for edges where there isn't a defined edge, like hair!) Masks can be deleted too, so you're not stuck with it.

 Basically, masks are things that tell photoshop what you want to be transparent versus opaque. Use shades of grey and you'll have semi transparent areas (nice for edges where there isn't a defined edge, like hair!) Masks can be deleted too, so you're not stuck with it.
At this point you can be done. File>Save (save photoshop file if you may want to make more changes later) and the File>Save As>Jpeg But since I am trying to mimic Lizs photo I want to make one more tweak.
Step 6. You'll notice now that your adjustment layers automatically have masks. Below I added another adjustment layer called photo filter. Photo Filter is nice to add a slight hue to your photo without it being crazy. I wanted to add a little yellow to the pin cushion but NOT the rest of the photo. I added the adj. layer, and then painted black all around the pin cushion. Now the only place this adjustment layer will change anything is where the mask is white.
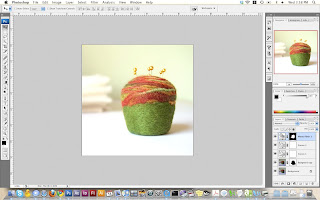 The final image:
 The final image:
Play around with the different adjustment layers and see what they do. There are endless possibilities. Let me know if you have any questions or if something is not clear... like I said, there is no right or wrong way to do this... just personal preferences. I find that masks and adjustment layers have been an improvement in my processes.


1 comment:
Awesome! Thanks for the info. This will definitely come in handy as I continue to play around with photoshop.
Post a Comment